As a supplier of PVC insulated nylon sheathed cables, I've had numerous inquiries about the proper way to connect these cables to electrical devices. This blog post aims to provide a comprehensive guide on this topic, ensuring that you can safely and effectively connect PVC insulated nylon sheathed cables to various electrical devices.
Understanding PVC Insulated Nylon Sheathed Cables
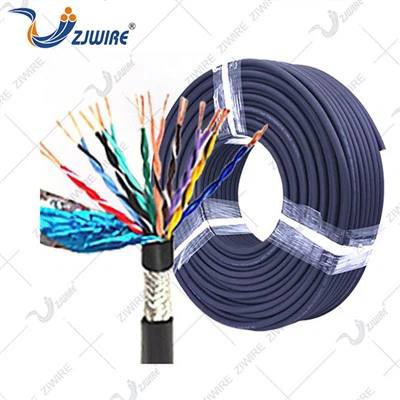
Before delving into the connection process, it's essential to understand the characteristics of PVC insulated nylon sheathed cables. These cables are known for their durability, flexibility, and resistance to abrasion, moisture, and chemicals. The PVC insulation provides electrical protection, while the nylon sheath adds an extra layer of mechanical protection.


There are different types of cables in the market, such as the UL2587 Cable and UL10362 Cable. These cables are designed to meet specific industry standards and are suitable for a wide range of applications. Another type is the THW2, which is known for its high-temperature resistance and is commonly used in electrical systems.
Tools and Materials Required
To connect PVC insulated nylon sheathed cables to electrical devices, you'll need the following tools and materials:
- Cable cutters: These are used to cut the cable to the desired length.
- Wire strippers: They are essential for removing the insulation from the cable ends.
- Screwdrivers: Different types of screwdrivers may be required depending on the type of electrical device and the connection method.
- Terminal blocks or connectors: These are used to make secure electrical connections between the cable and the device.
- Electrical tape: It provides additional insulation and protection for the connections.
- Heat shrink tubing (optional): This can be used to provide a more permanent and professional-looking insulation for the connections.
Step-by-Step Guide to Connecting PVC Insulated Nylon Sheathed Cables
Step 1: Prepare the Cable
- Measure and cut the cable: Determine the required length of the cable and use cable cutters to cut it. Make sure to leave some extra length for easy connection.
- Strip the insulation: Use wire strippers to remove a small section of the outer nylon sheath and the inner PVC insulation from the cable ends. The length of the stripped section will depend on the type of terminal block or connector you're using. Generally, a length of about 1/2 to 3/4 inch is sufficient.
Step 2: Select the Appropriate Terminal Block or Connector
- Consider the device requirements: Different electrical devices may require different types of terminal blocks or connectors. For example, some devices may have screw terminals, while others may use quick-connect terminals.
- Match the cable size: Ensure that the terminal block or connector is suitable for the size of the cable you're using. Using an incorrect size can result in a poor connection and may pose a safety hazard.
Step 3: Make the Electrical Connection
- Insert the stripped wire into the terminal block or connector: If using a screw terminal, insert the wire into the terminal hole and tighten the screw to secure it. Make sure the wire is firmly held and there is no loose connection.
- If using a quick-connect terminal, follow the manufacturer's instructions: Usually, you'll need to insert the wire into the terminal and then use a tool to crimp it in place.
Step 4: Insulate the Connection
- Apply electrical tape: Wrap electrical tape around the connection to provide additional insulation. Make sure to cover the exposed wire completely.
- Use heat shrink tubing (optional): If you have heat shrink tubing, slide it over the connection before making the electrical connection. After the connection is made, use a heat gun to shrink the tubing, providing a tight and secure insulation.
Step 5: Test the Connection
- Before powering on the device, double-check all the connections: Make sure there are no loose wires or exposed conductors.
- Use a multimeter to test the continuity of the connection: This will ensure that the electrical current is flowing properly through the cable and the device.
Safety Precautions
- Turn off the power: Before working on any electrical connection, always turn off the power supply to the device to avoid the risk of electric shock.
- Wear appropriate safety gear: This includes safety glasses and insulated gloves to protect yourself from any potential hazards.
- Follow local electrical codes and regulations: Different regions may have specific electrical codes and regulations regarding cable connections. Make sure to comply with these requirements to ensure a safe and legal installation.
Troubleshooting Common Issues
- Poor connection: If you're experiencing a poor connection, check to make sure the wire is properly inserted into the terminal block or connector and that the screw is tightened securely. You may also need to clean the terminal contacts to remove any dirt or corrosion.
- Overheating: Overheating can be a sign of a loose connection or an overloaded circuit. Check the connections and make sure the cable and the device are rated for the electrical load.
- Short circuit: A short circuit can occur if the insulation is damaged or if there is a loose wire touching another conductor. Inspect the cable and the connections for any signs of damage and repair or replace as necessary.
Conclusion
Connecting PVC insulated nylon sheathed cables to electrical devices is a relatively straightforward process if you follow the proper steps and safety precautions. By using the right tools and materials, making secure connections, and testing the connection, you can ensure a safe and reliable electrical installation.
If you're interested in purchasing high-quality PVC insulated nylon sheathed cables or have any questions about cable connections, please feel free to contact us. We're here to provide you with the best products and technical support to meet your needs.
References
- Electrical Wiring Handbook, 17th Edition
- National Electrical Code (NEC)
- Manufacturer's instructions for PVC insulated nylon sheathed cables and electrical devices